
Visualize your TestFit projects and deals with Enscape
What it is and how it is different
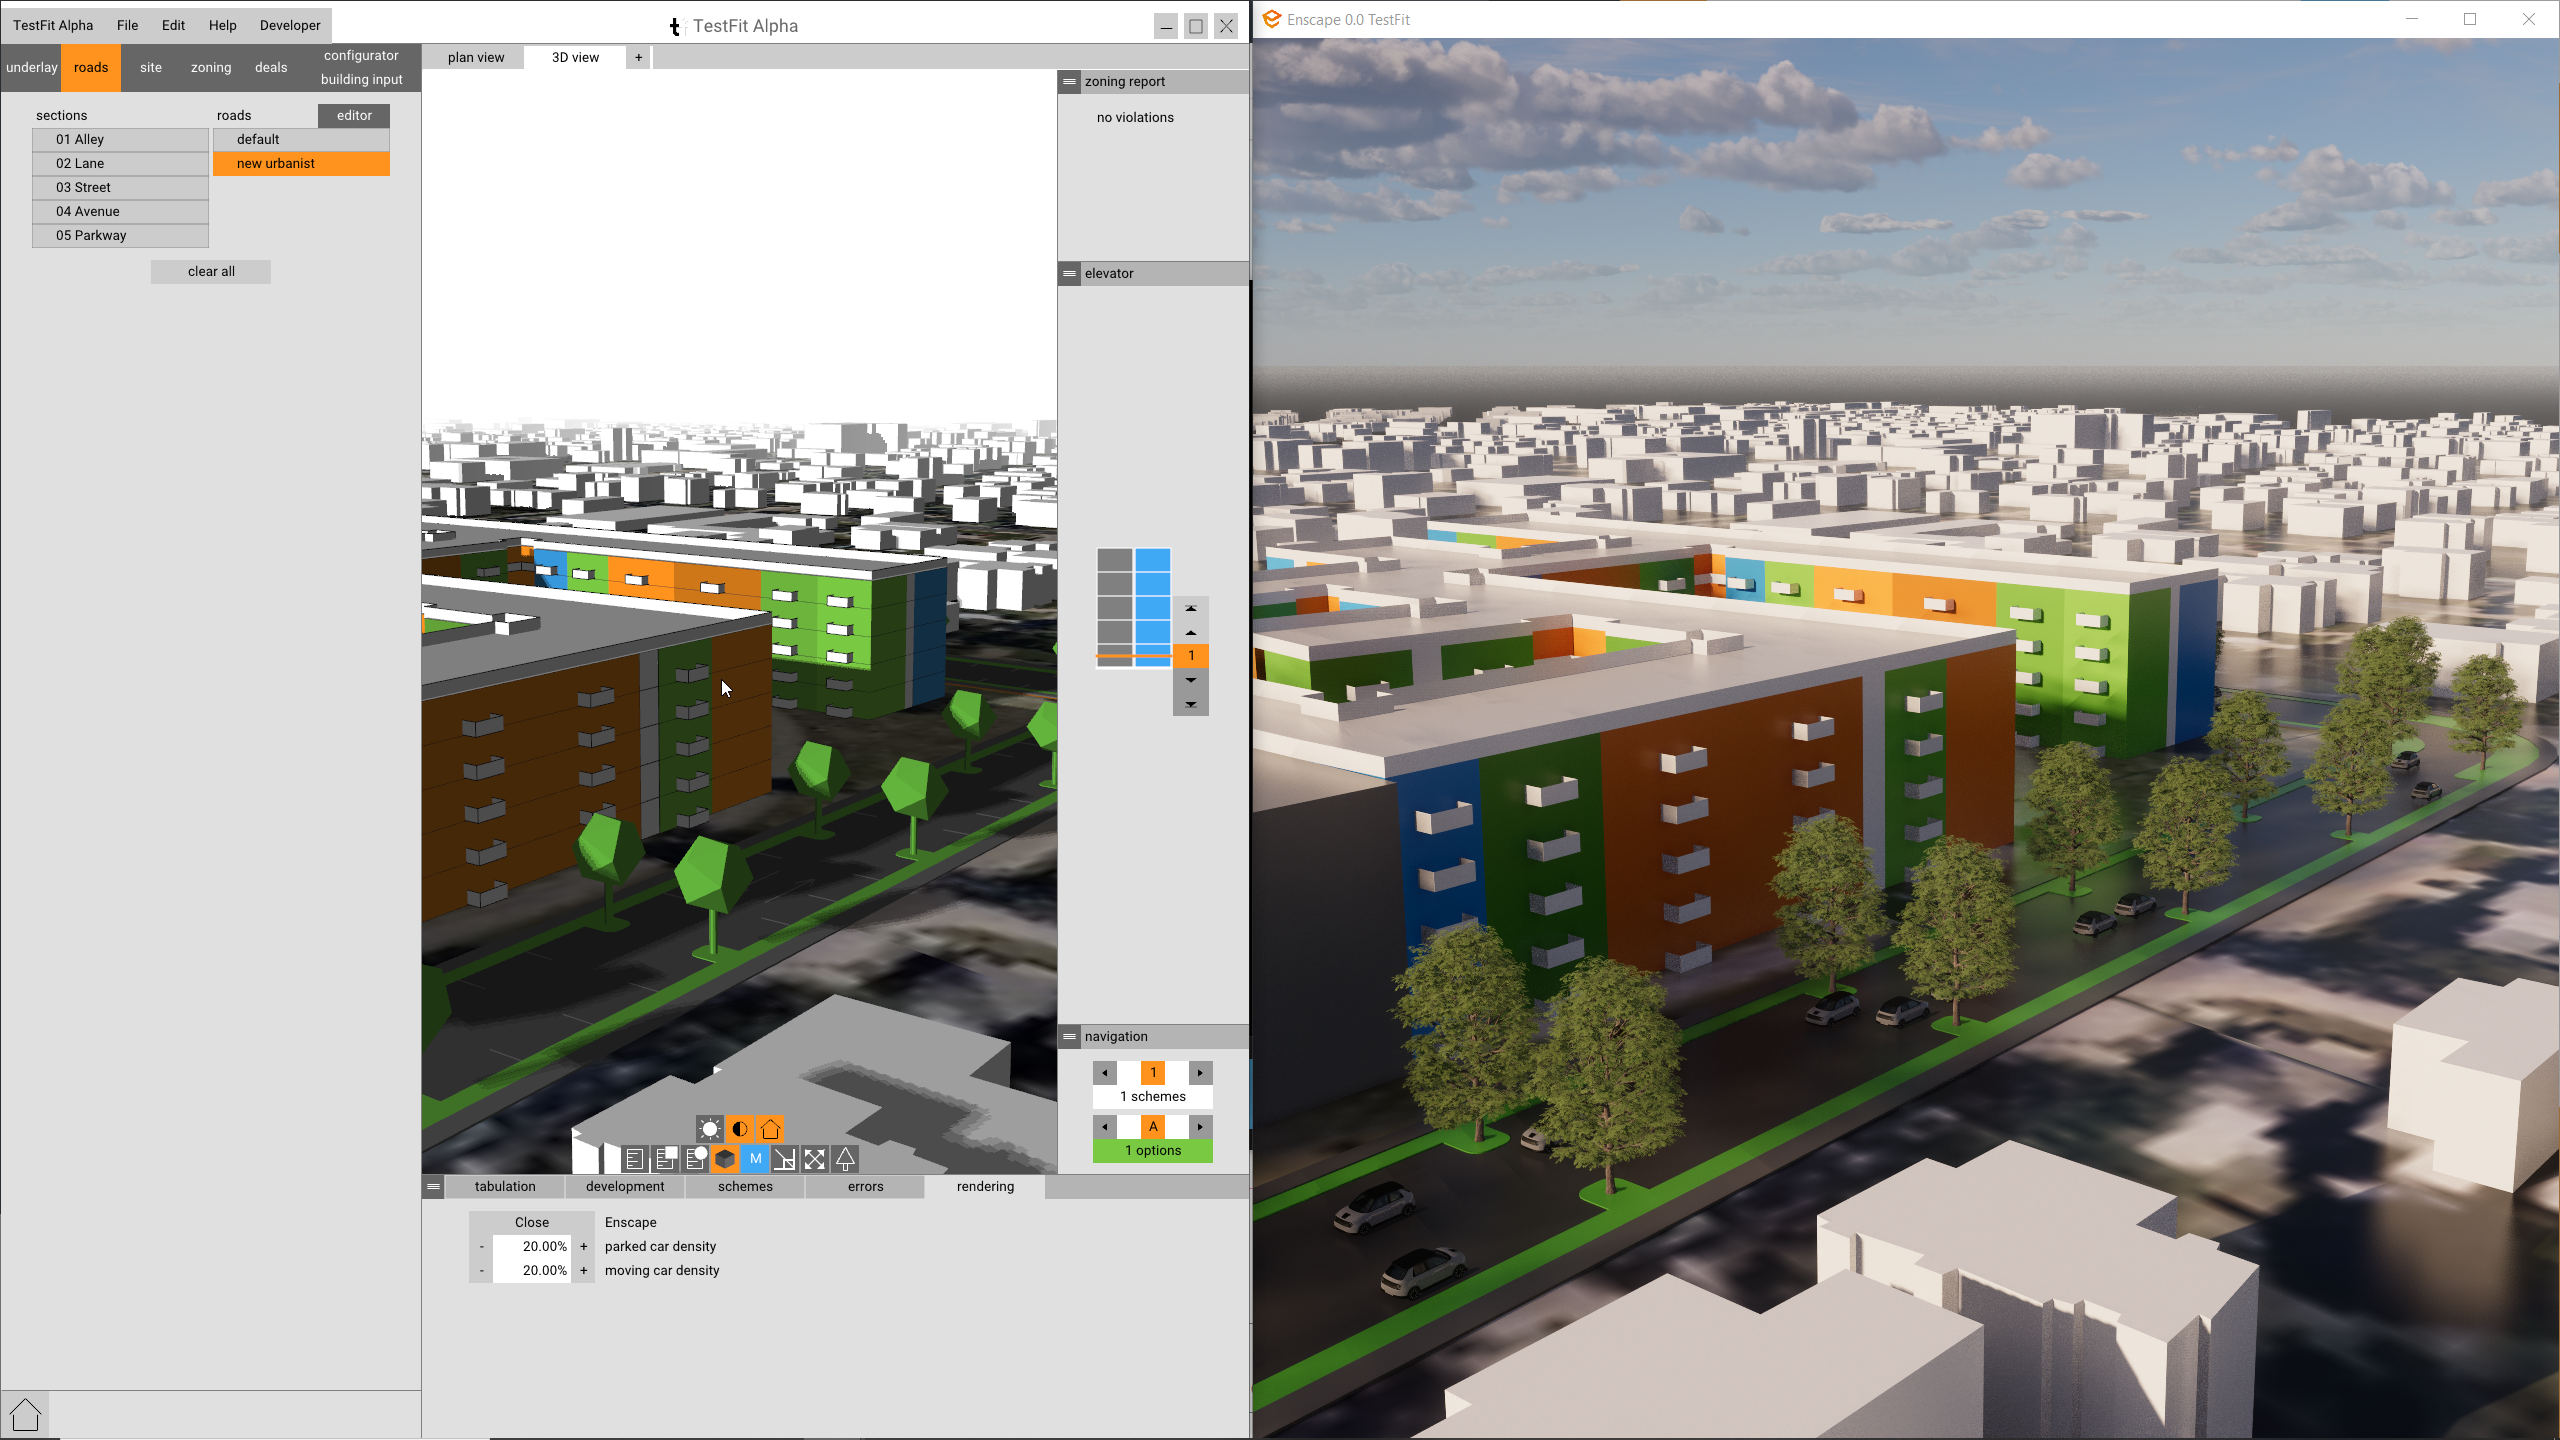
Enscape for TestFit allows users to create visual renderings of your TestFit projects. By having Enscape for TestFit a lot of the work that would be done manually can be completed automatically. Placement of assets like trees and cars are automatically placed and can be tweaked to your liking. Enscape has specific hardware requirements, you can view them here.
How you use it
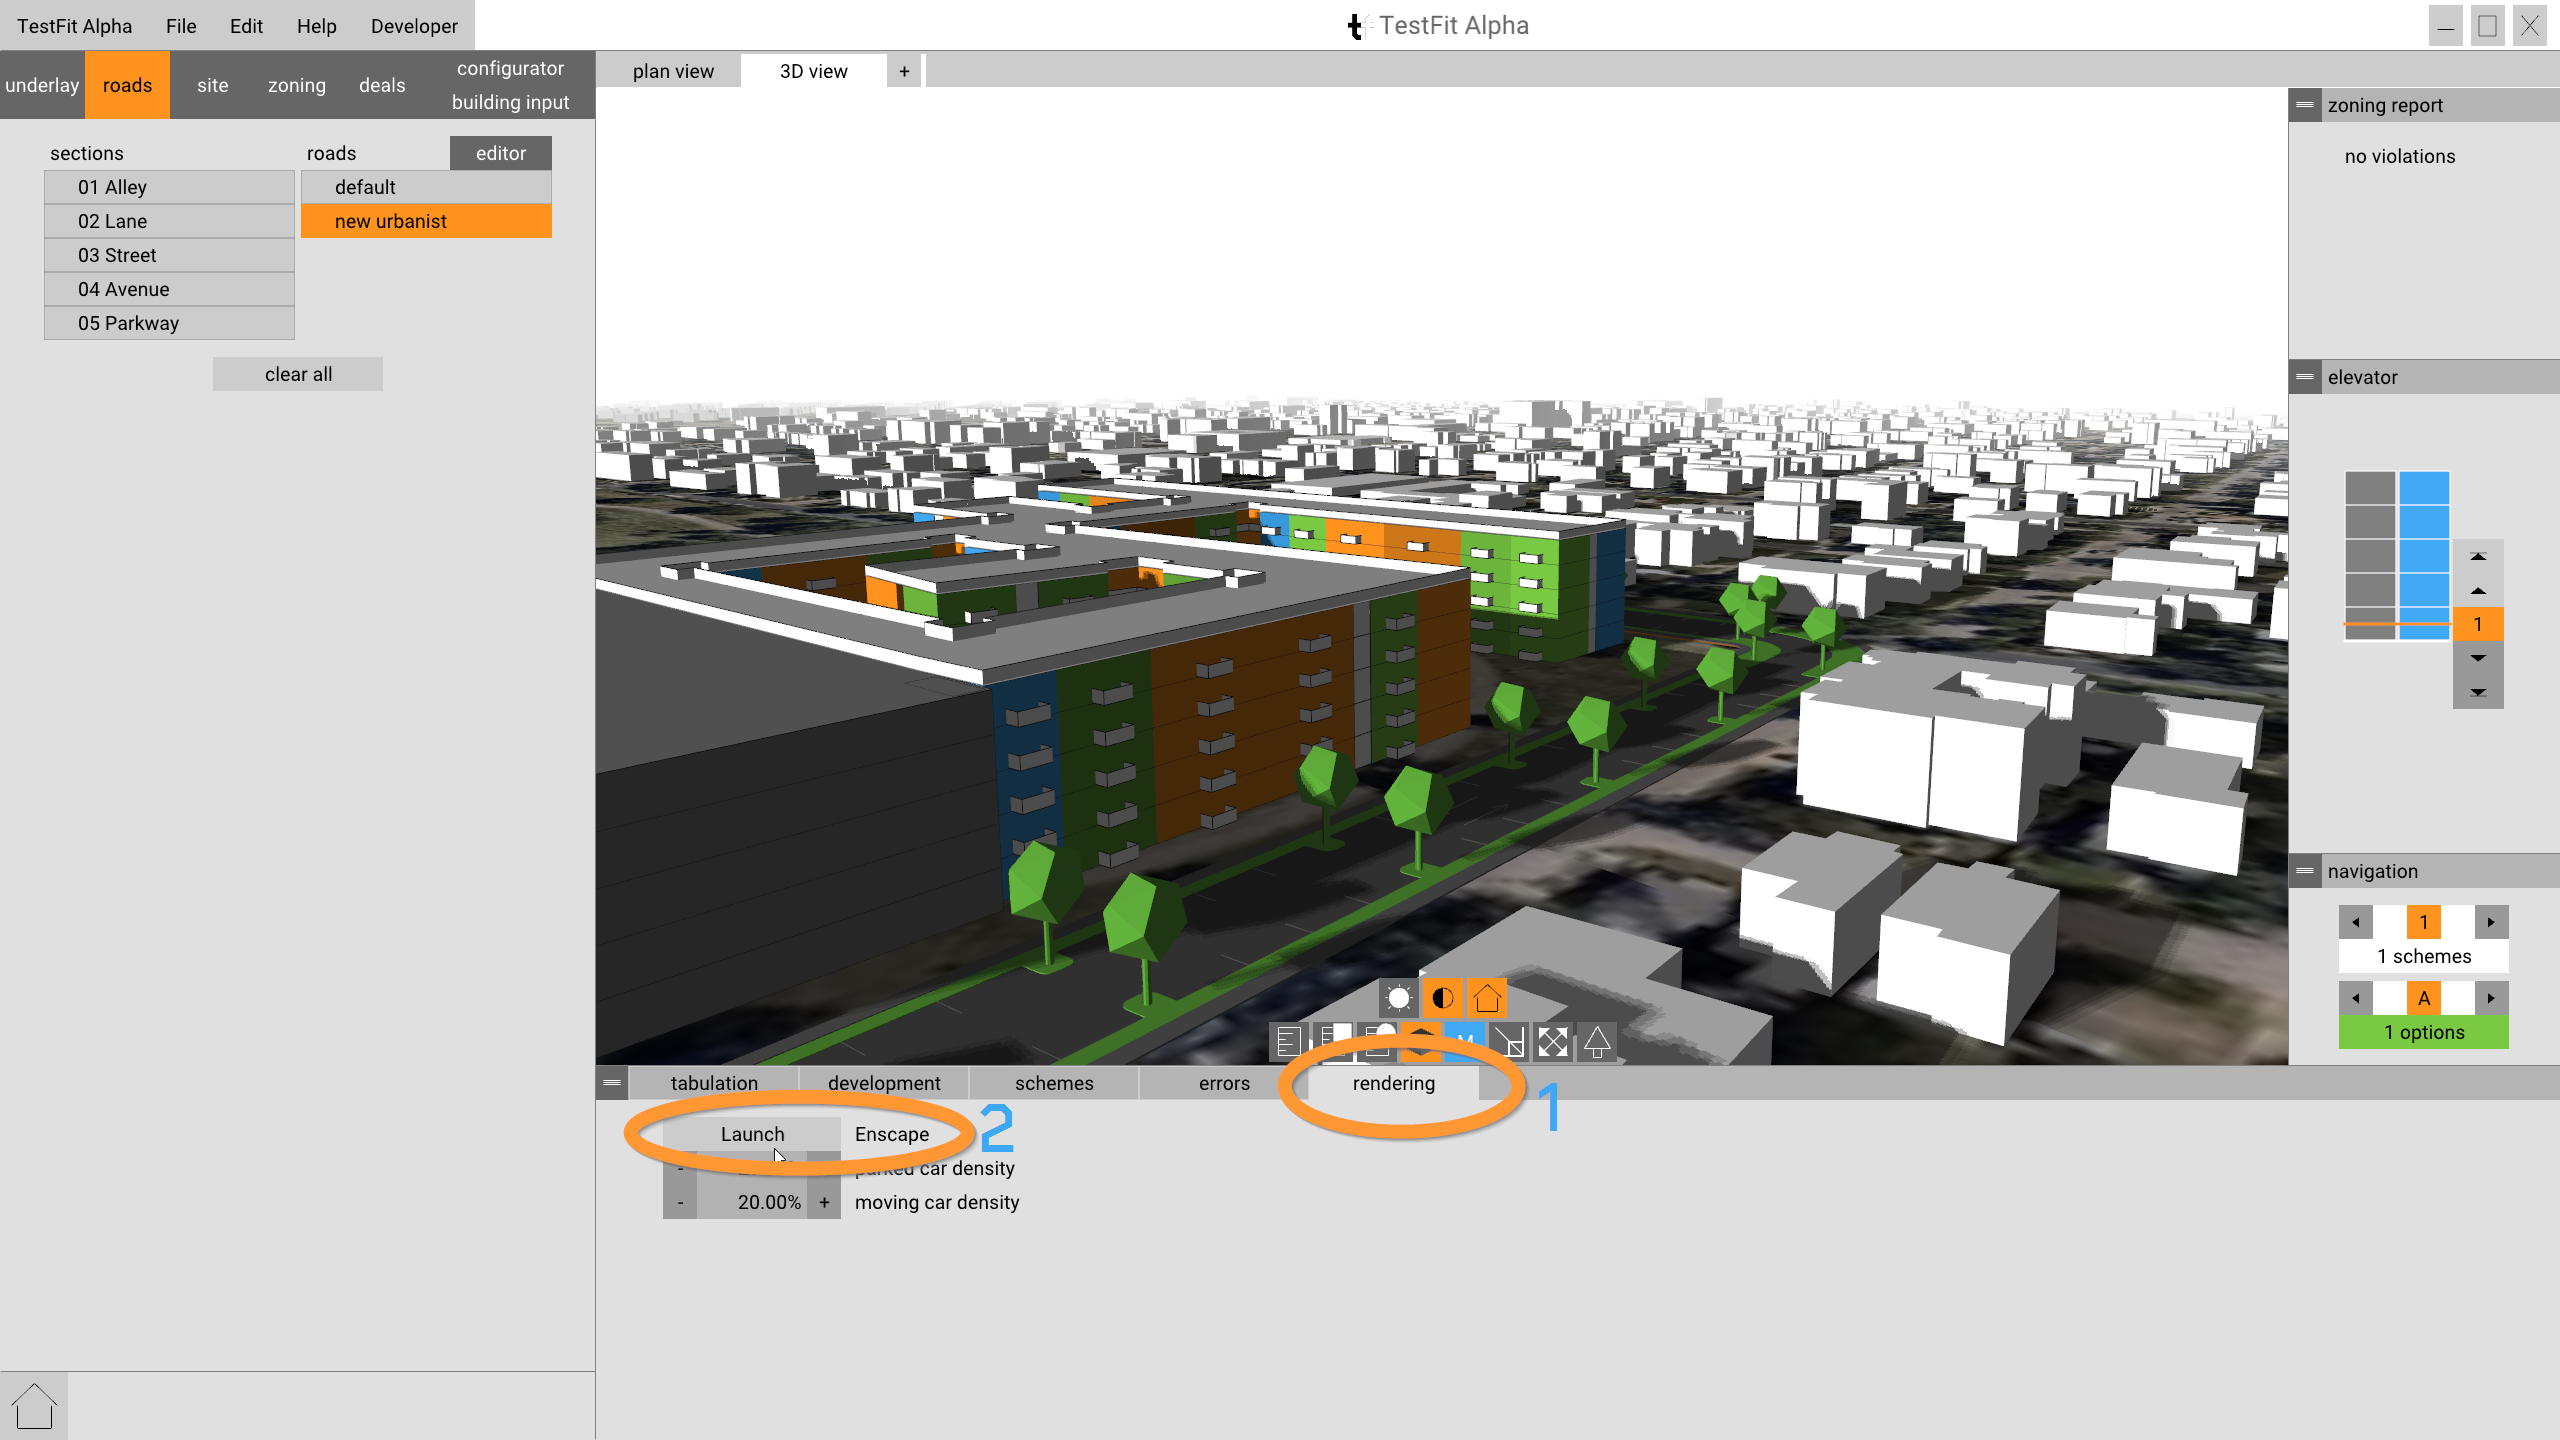
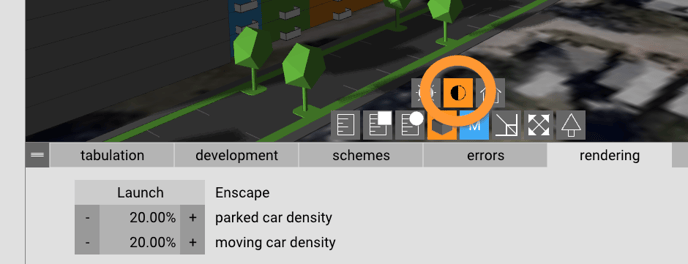
Create your TestFit project, open the Rendering tab at the bottom of the screen, and press the Enscape Launch button. That's it. A separate Enscape window will appear with your project rendered.
Movement
When you move/navigate/rotate in the 3D view of TestFit, Enscape will mimic your TestFit movements. If you'd like to move in Enscape, separately from TestFit, you can use the WASD keys, as well as Shift, Control, and mouse movements to move freely in the render.
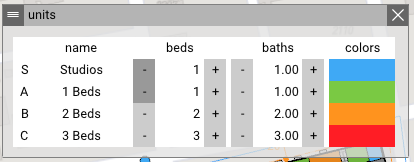
Building Colors
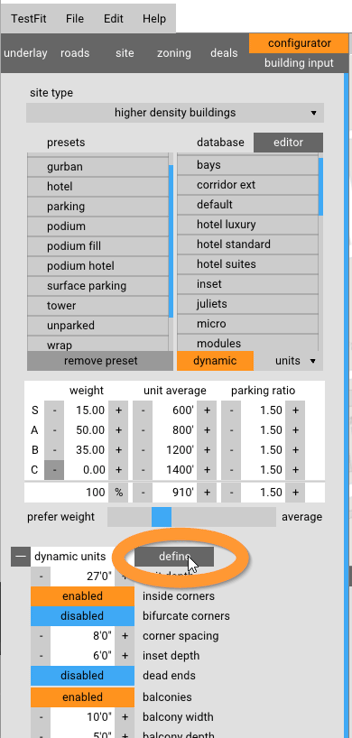
To change the colors of the building and units, navigate to the Configurator tab, go to the Dynamic Units section, and press the Define button. The Units dialog will appear and individual unit colors can be changed. Make sure the Toggle Colors button is checked at the bottom of the view.
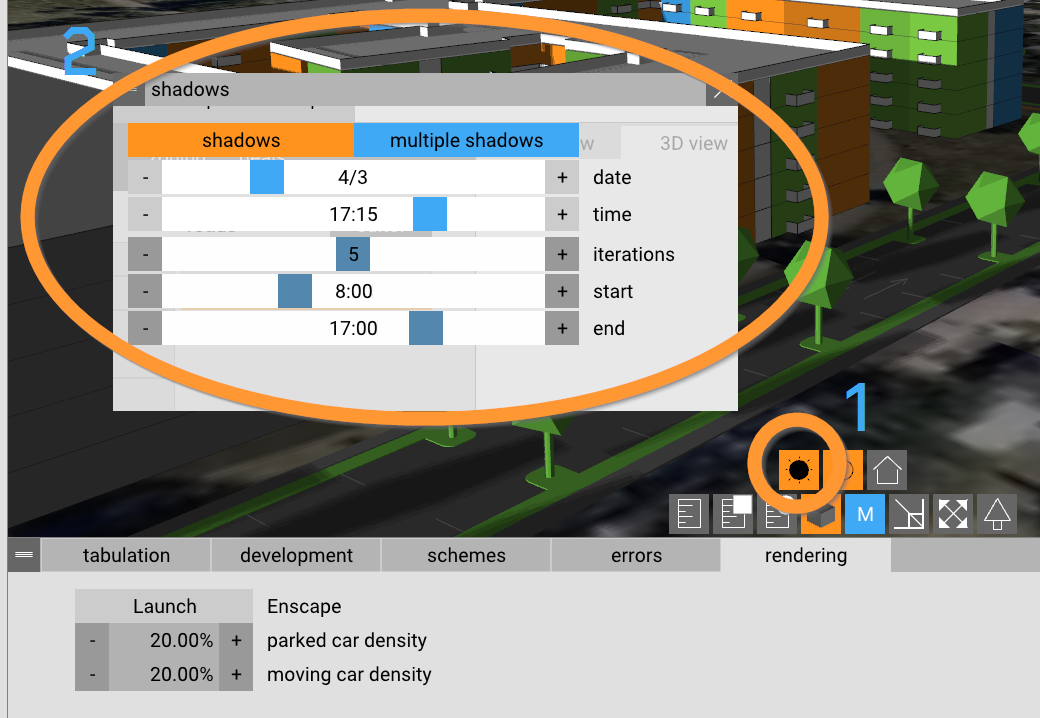
Lighting & Shadows
To change lighting and shadows, click the shadows button in the TestFit window. You can adjust the date and time of day and Enscape will create shadows based on the date and time.
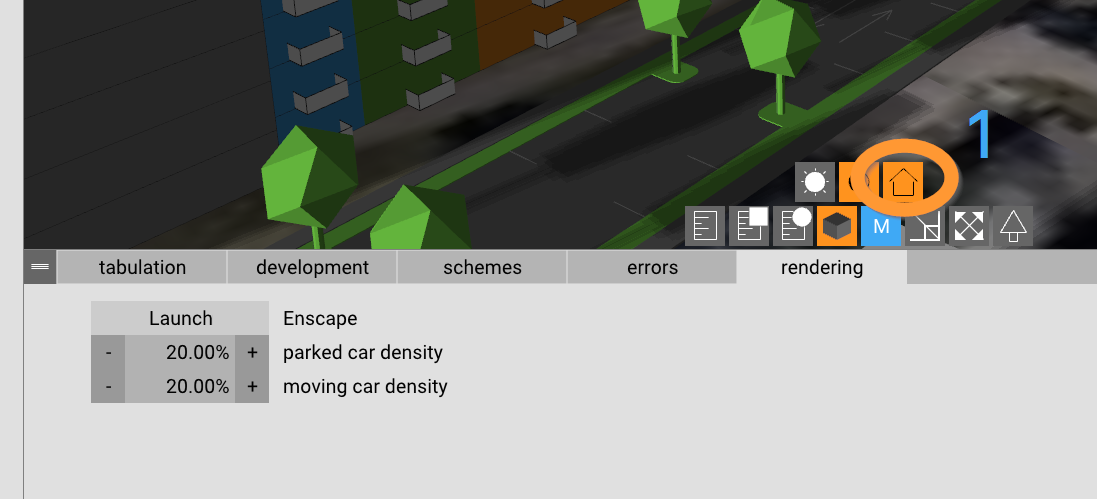
Context Buildings
Context buildings can be shown in Enscape. Press the Context Building button on the bottom of the TestFit view.
Assets
Trees
Trees are automatically placed on landscape parking dividers and users can manually add them. To manually add trees, go to a plan view in TestFit, press the tree button on the bottom of the view, and place it on your site. Trees will only be placed on the ground level (sorry, no green roofs yet). To delete a tree that you placed, right-click and delete.
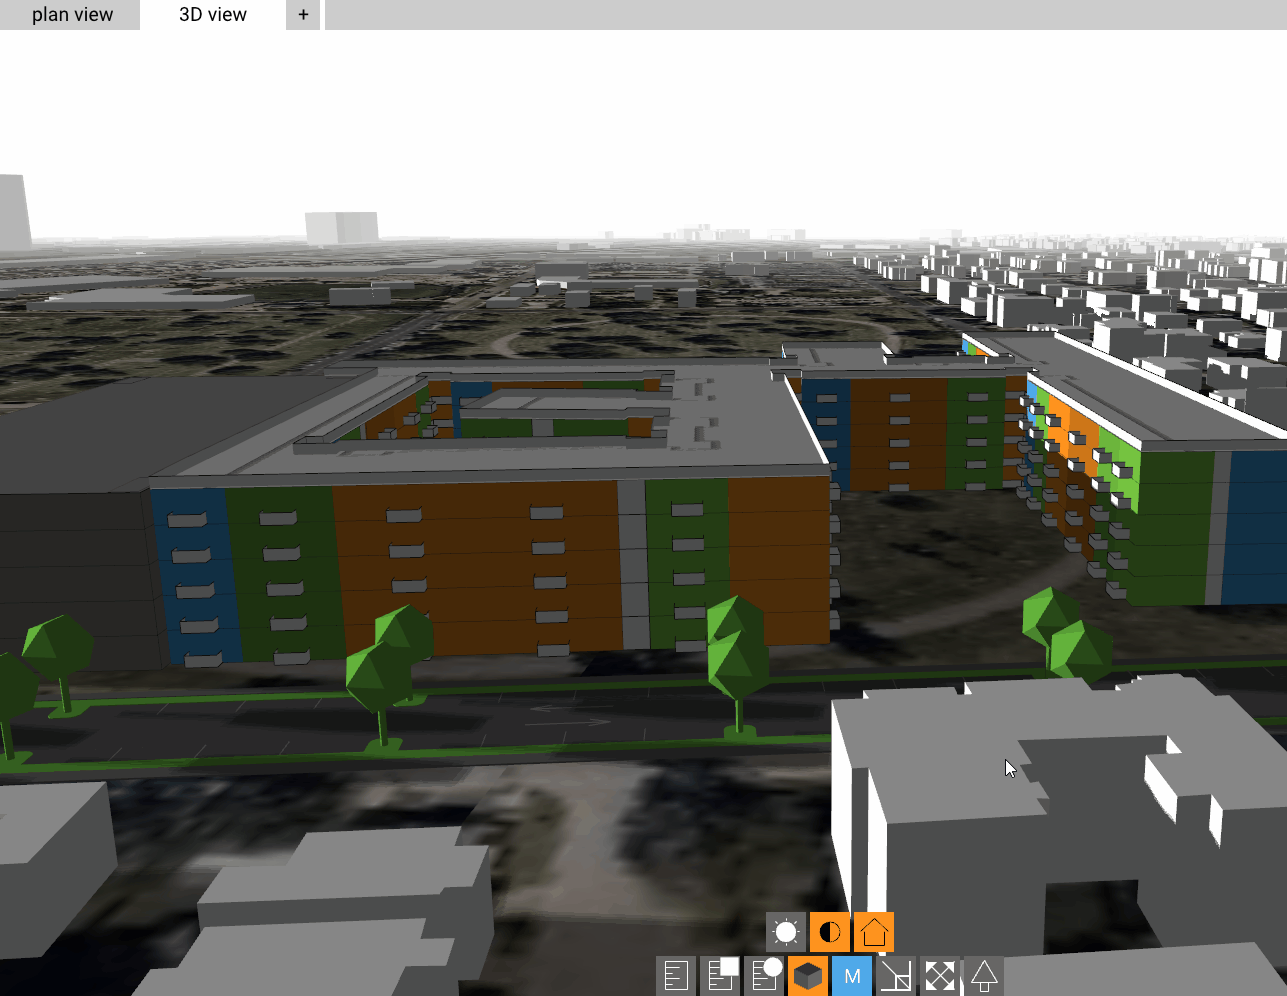
Cars
Cars are always placed on roads and in parking stalls. The car density in each location can be adjusted in the Rendering tab in TestFit.

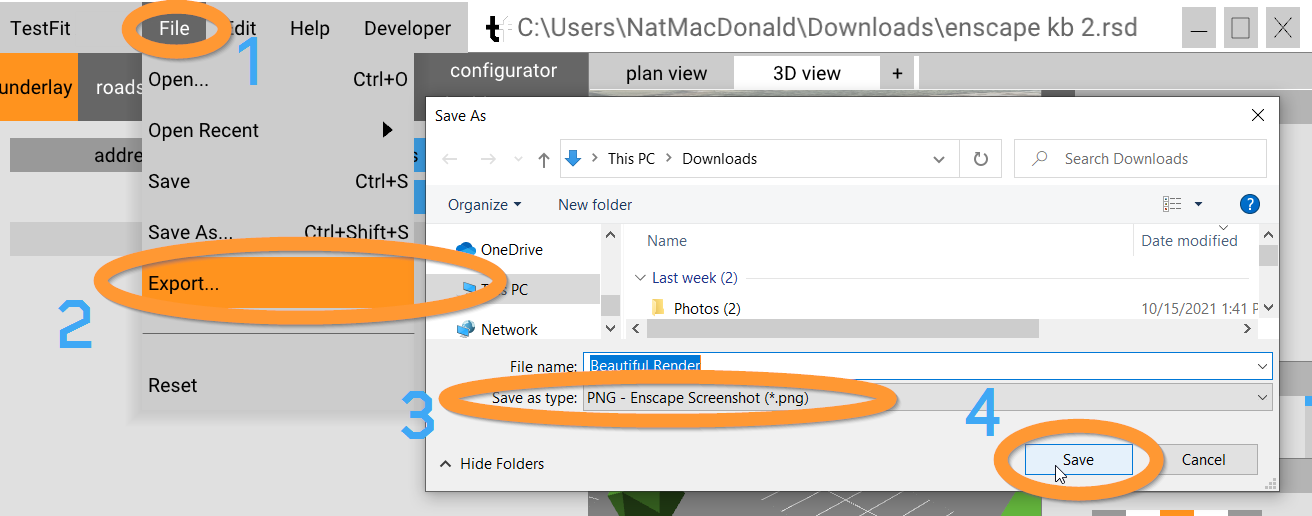
Exporting
Enscape renderings export to lossless PNGs. To save your current view in Enscape, go to File->Export As->change the Save as type to PNG - Enscape Screenshot (*.png). and click save.
System Requirements
The minimum system requirements can be found here.
NOTE: As mentioned in the system requirements above, Enscape for TestFit is not supported in the MacOS version of TestFit.