How do I Add Drive-thrus to Retail Spaces?
Single or multi-lane drive-thrus can be added to mass-based retail spaces

Follow these steps to add a drive-thru to a retail space:
- Click the three dots at the end of a mass-based space layer (or right click the space in canvas) and select Add Drive Thru

- Select the drive-thru layer in the Nav Tree. The drive-thru will highlight blue in Canvas. The blue node will indicate the start of the drive thru. Left click+ hold, drag the node to the desired location about the hosting space layer.

- Extend the drive-thru as required by selecting and extending the grip to the desired location.

- Hover over the start or end of the drive-thru, and a circle will appear. Drag these circles to indicate an extension of the entry/exit points. To remove the extensions, remove the newly added layers in the Nav-Tree (Drive-thru Entrance/Exit).


Multi-Lane Drive Thrus
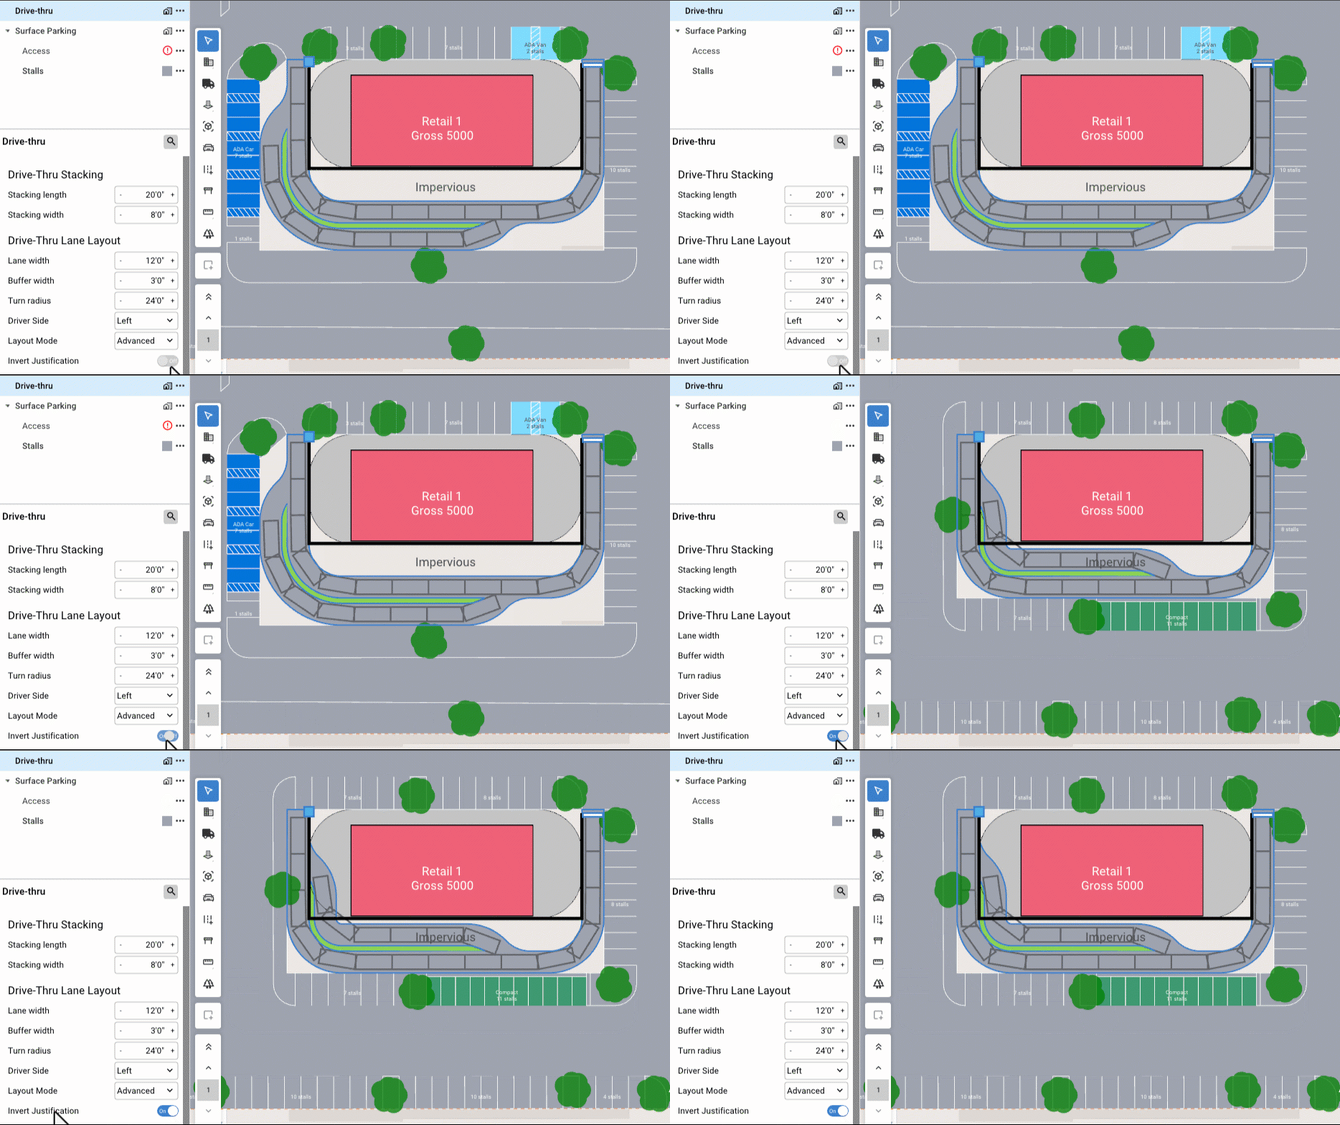
Invert Drive-thru Section
The advanced drive-thru section can be inverted in alignment by selecting toggling on the Invert Justification toggle.

Drive-thru Properties
To modify stacking dimensions or additional drive-thru aisle properties like lane width, turning radius, and driver side orientation, scroll down to the Property Panel with the drive-thru layer selected in the Nav-Tree and adjust parameter values as required.

Tabulation
Stacking quantities can be found under Tabulation in the Retail column.

Drive-thrus are only accessible with a subscription of TestFit Site Solver
