Setbacks
How to manipulate setbacks in TestFit
Setbacks allow architects and developers to easily incorporate zoning laws set by cities. Setbacks in TestFit are owned by the site definition lines and can be manipulated in 2D or 3D to adjust the envelope of the building.
In order to edit a setback, you must select the site line that would drive the setback. Then you can either edit it in 2D in the Site panel or in 3D in the view panel.
Defining Setbacks
You can define Front, Side, and Rear setbacks by clicking the setback, and then selecting the definition in the drop down.
Setbacks in 2D
To adjust basic setbacks in plan view, drag the setback to the desired length. You can reset all setbacks or apply this setback to the rest of the edges.
Adjusting Building Setbacks
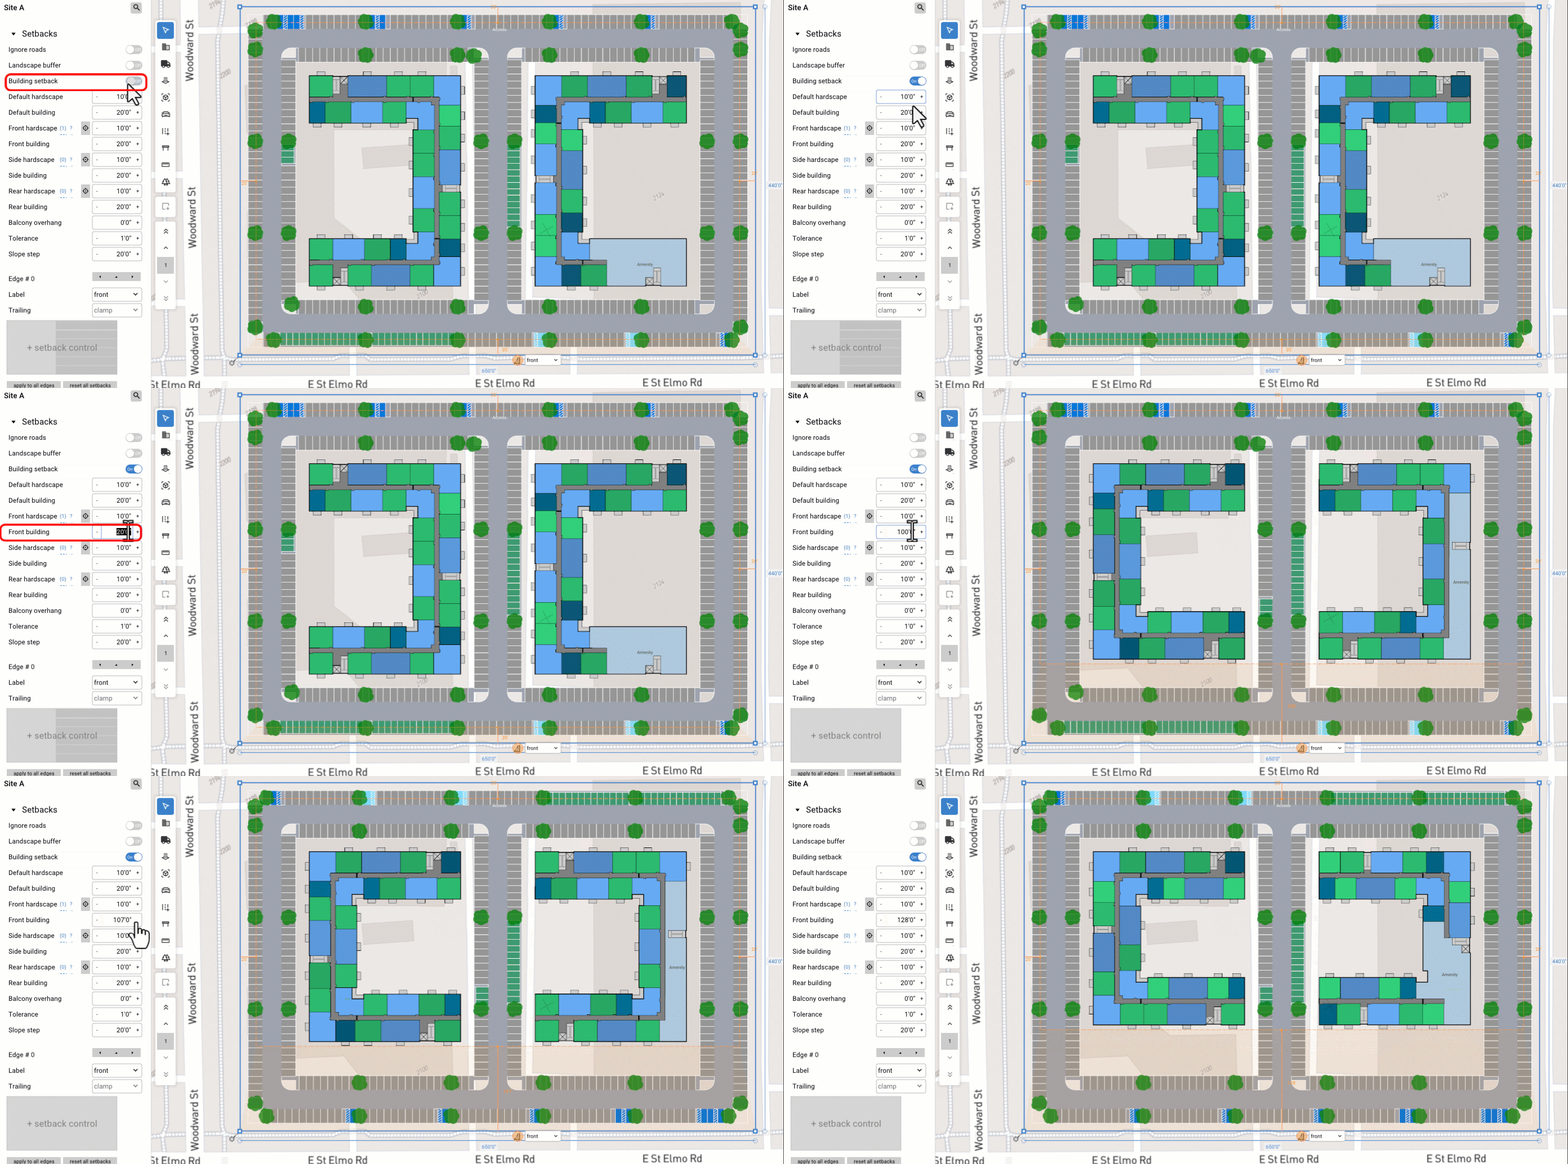
To adjust building setbacks, toggle on Building setbacks. Then, drag the building setback in Canvas or enter the parameter building setback value in the Property Panel.

Note, standalone below grade parking structure regions and surface parking can have their own hardscape setback when the Building setback is toggled on.
To adjust the hardscape setback, enter the corresponding parameter value in the Property Panel
Setbacks in 3D
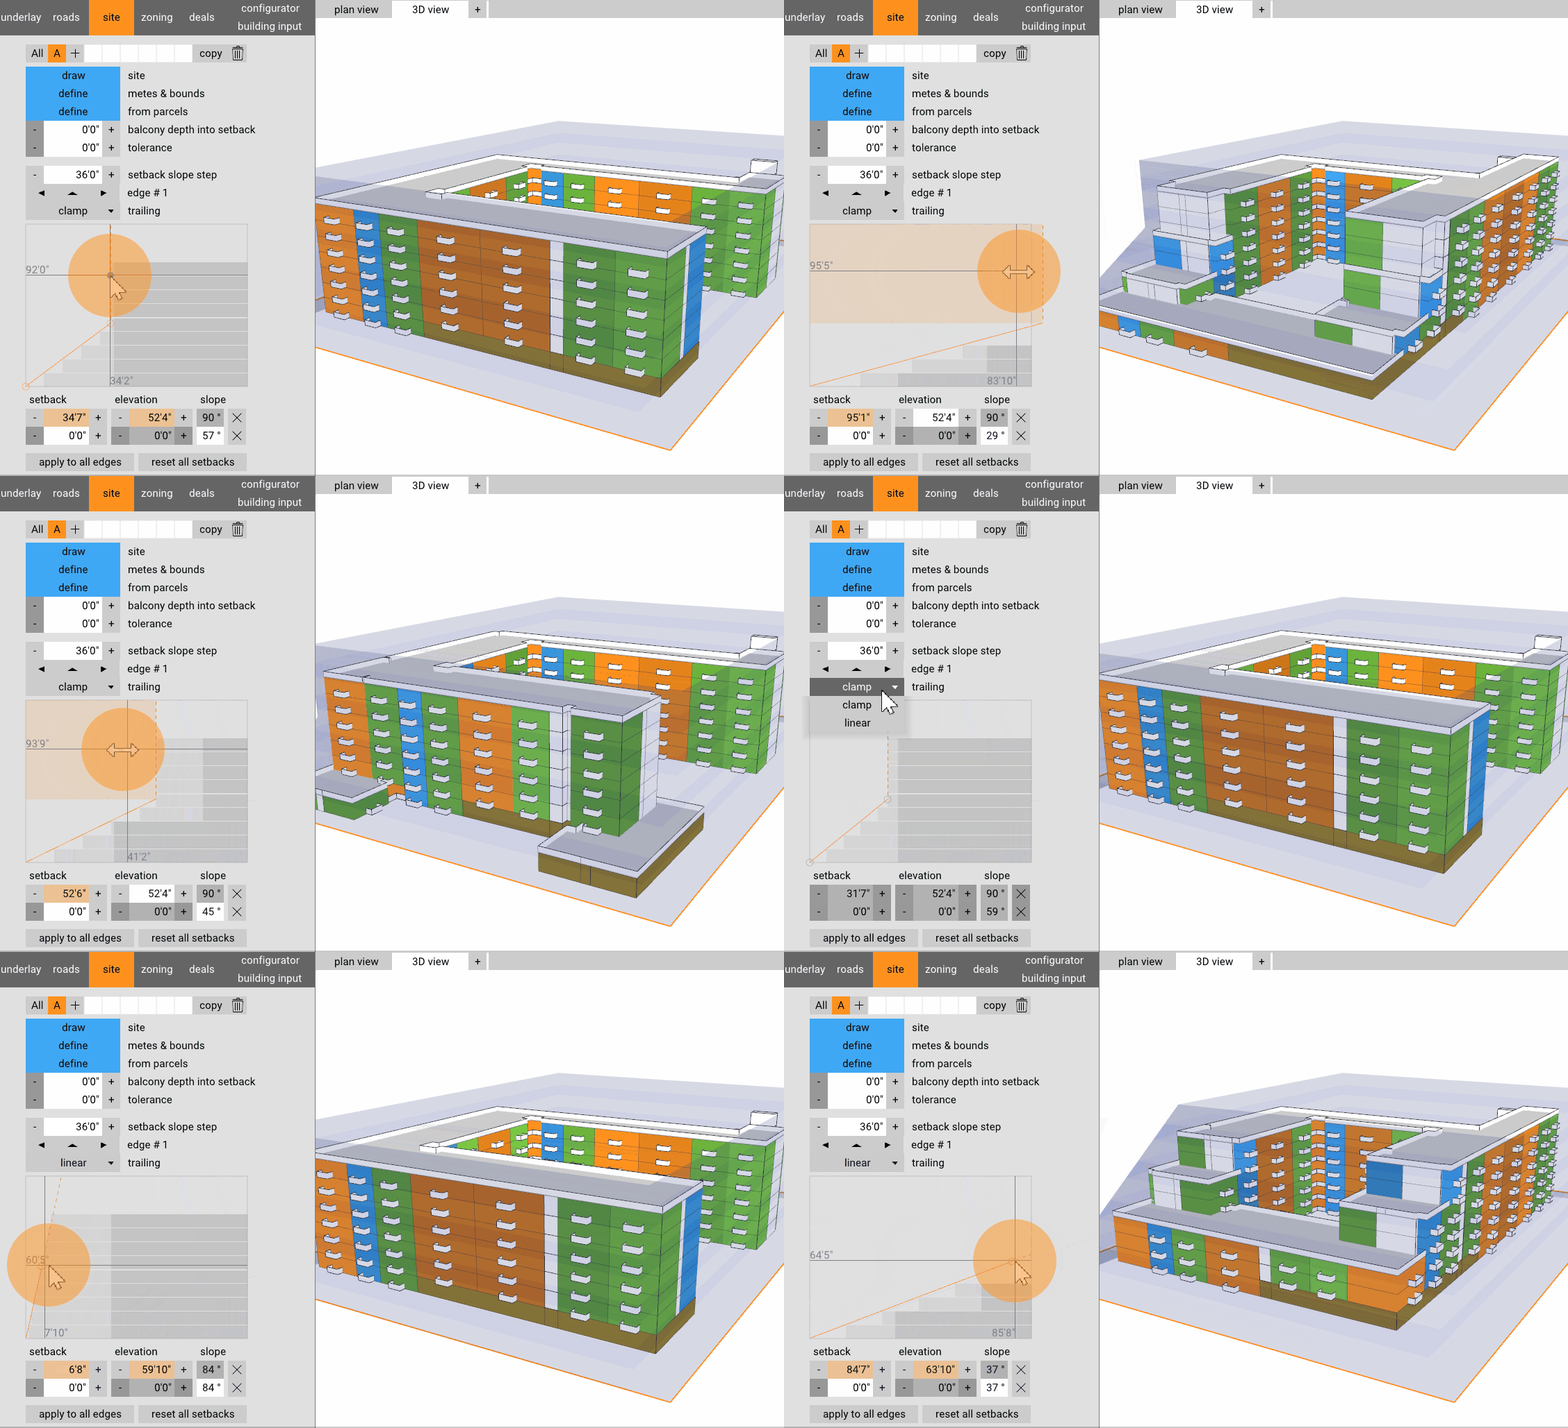
You can also push and pull setbacks in 3D.
Custom Setbacks in 2D
In the site panel you can adjust whether the setback is clamp trailing or linear trailing.

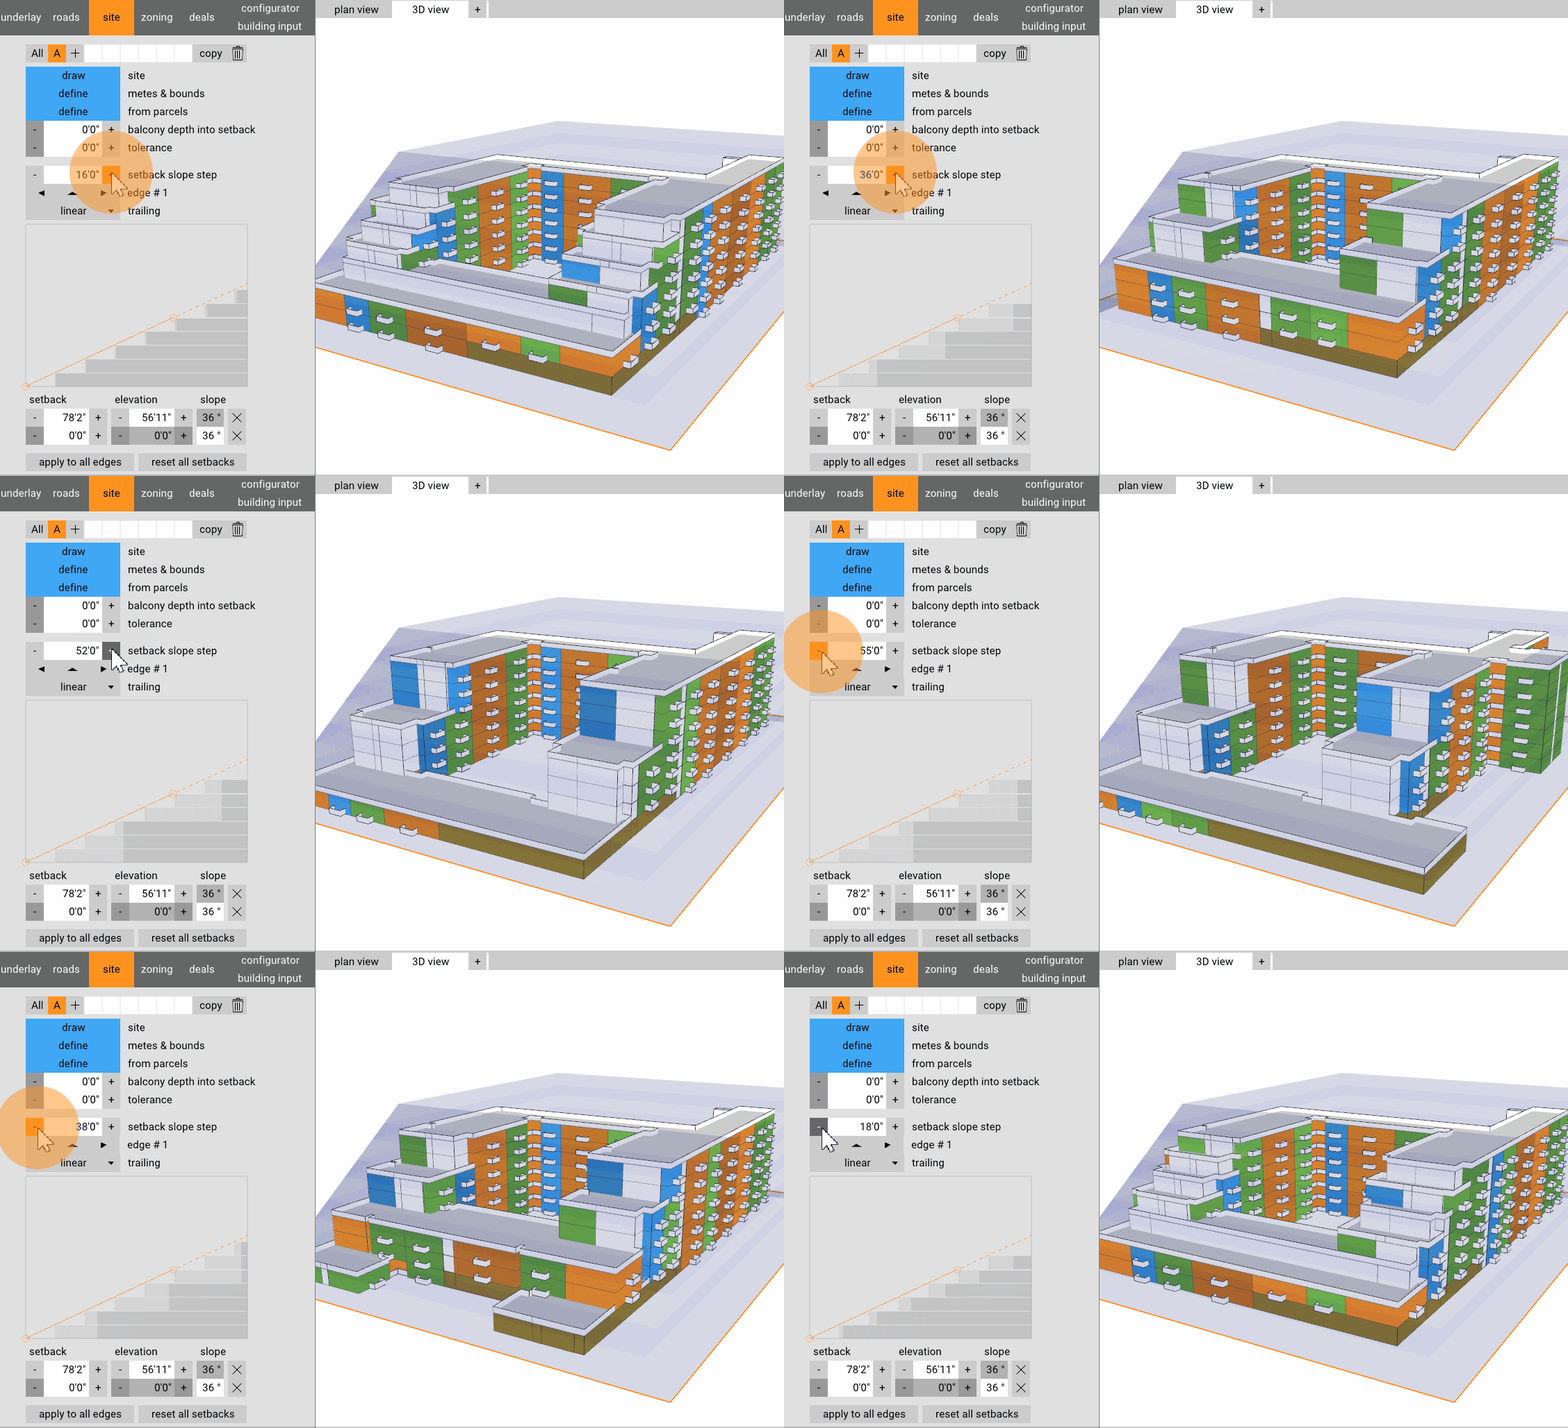
You can also adjust how small or large the step of the setback is.

Setbacks at Height
Check out this short video to understand how to manipulate setbacks at height.
There are two ways to adjust setbacks at height.
First, you can use the setback table in the Zoning panel:
The other way is to do it in the model by shift+clicking on the setback at the height where you want to define the setback.
